720-885-9111

7208859111

Author name: Rey Macias

Uncategorized

Create a Productive Workspace with a Backyard Office Shed

THE IDEAL BACKYARD WORKSPACEFor many, one of the biggest challenges recently has been staying productive while working from home. Millions have shifted to both living and working in their homes, making it difficult to find suitable spaces for both. While spare bedrooms or basements might serve as short-term solutions, a backyard office shed is becoming an increasingly popular choice for creating the perfect work environment at home. A CUSTOM WORKSPACE IN YOUR BACKYARDWith an affordable shed kit and some creativity, remote workers across the country are crafting their ideal workspaces right in their backyards. Working remotely isn’t new; many entrepreneurs and small business owners have been operating from home for years. However, with more households needing separate workspaces, the backyard office shed offers an affordable and effective solution. It provides a private, distraction-free area to focus without the significant expense of moving or building a home addition. BENEFITS OF A BACKYARD OFFICE SHEDA backyard office shed offers numerous advantages, including affordability and customization. There are many options available, from pre-fabricated models to custom-built designs that suit your specific needs and budget. Depending on its size and placement, you may not even need a building permit. Be sure to check local regulations and homeowner association guidelines to ensure compliance with any size or design restrictions before purchasing a kit. GET PROFESSIONAL ASSISTANCEAfter selecting the right backyard shed, proper assembly is crucial. While pre-fabricated kits are designed for easy installation, building a shed still requires time, the right tools, and expertise, particularly if electrical wiring, internet access, or a solid foundation is needed. For a seamless experience, consider hiring a professional you can trust to ensure the shed is built correctly and fully equipped to meet your needs. Denver Home Repair specializes in helping homeowners with projects like backyard office sheds. Our skilled professionals will complete your project efficiently and ensure the space is ready for you to stay focused and productive. NEED HELP?Whether you need assistance assembling your backyard office shed or require other home repair services, Denver Home Repair is here to help. Contact us today to schedule an appointment and bring your vision to life!

Uncategorized

How To Clean Concrete in 6 Steps

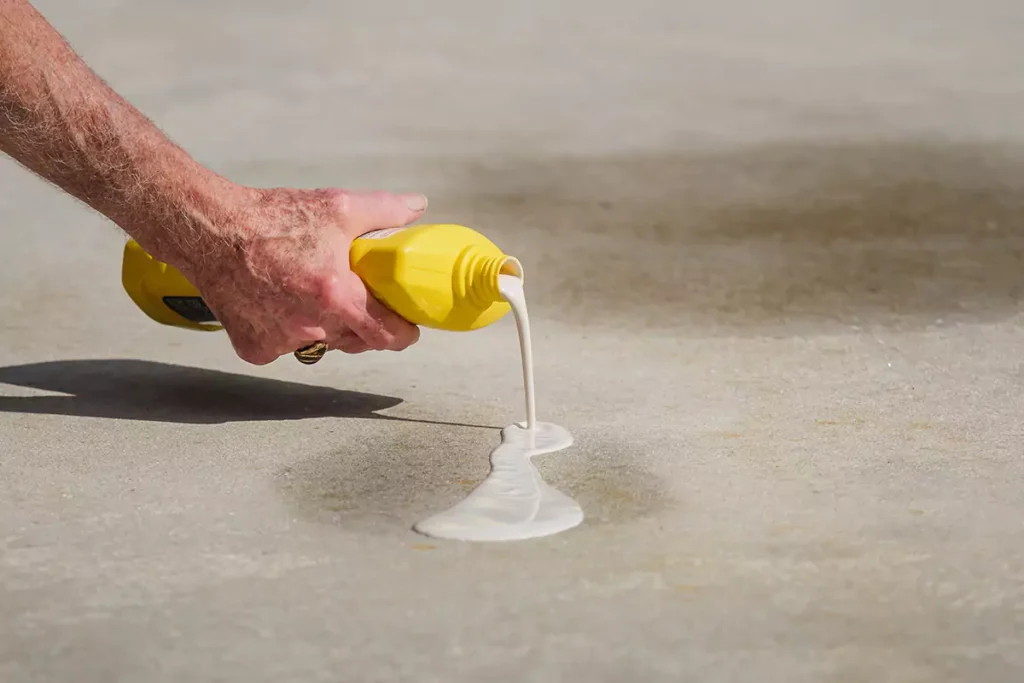
Quick answer: In this guide, you’ll learn the process for cleaning concrete:Assess the condition of your concreteGet your supplies togetherPrep the concreteApply cleaning solutionsScrub the concreteRinse the concrete It’s easy to assume that concrete doesn’t need a lot of TLC to keep it in good shape. After all, it’s made out of rocks! But concrete has to be maintained. If it isn’t, minerals, debris, plant matter, and dirt can take a toll. They can erode, stain, and even crack. Taking care of your concrete surfaces can help them look better and last longer. Learning how to clean concrete is relatively easy. This guide from the team at Denver Home Repair® will show you six easy steps to help you clean your sidewalks, patios, driveway, and other concrete surfaces. With a few supplies, some elbow grease, and time, your concrete will look great again. Step 1. Assess Your Concrete’s Condition Before you clean your concrete driveway, patio, or floor, you’ll need to figure out what the issue is. Many concrete stains are caused by dirt or plant matter, which are usually near the surface and are cosmetic only.  On the other hand, oil, grease, moss, and rust stains are usually deeper and might be accompanied by physical damage to your concrete. If your concrete is chipped or has chunks missing, be careful about applying too much pressure or using certain kinds of cleaners, like bleach. They could make the damage worse.  If you aren’t sure how deep a stain is, sweep the area, then press a paper towel onto the stain. If there’s nothing on the towel when you lift it up, the stain will probably take a little extra work to get out. If oil or grease is on the towel, try to dab as much of it up as you can before getting it wet. Inspecting and cleaning your concrete before you begin new deck or patio construction can help you avoid a lot of headaches, expenses, and wasted time.   Step 2. Gather Supplies  After you’ve assessed your concrete and decided that cleaning won’t damage it, get your supplies together. Prepping your materials before you start will make the process a lot faster.  For dirt and light stains, water and dish soap is usually good enough. If you have dark stains like rust or oil, pick a concrete cleaner that’s made to take care of those specific stains. A stiff-bristled brush will help get rid of built-up dirt and debris and, when paired with the right cleaning solutions, can even remove oil, grease, and rust. A pressure washer can also help remove a lot of surface stains.  Protective gear is a must when working with a pressure washer or chemical cleaners. Thick gloves, eye protection, and long sleeves and pants can help keep chemicals off your skin and protect you from any flying debris. Step 3. Prepare the Surface With all of your supplies ready, you’ll want to start by preparing the surface. The first step is to remove any debris. Sweep up leaves, dirt, grass, dust, rocks, and any other loose materials to keep your work area clear of obstructions.  Once you’ve swept the concrete, get it wet. Spraying the concrete with water before adding the cleaning solution will help it absorb the cleaner. This is especially important if there are deep stains, moss, or oil you’re trying to remove. If you’re cleaning on a hot day, you can spray one section of your concrete at a time to keep it from drying before you apply your cleaner. Step 4. Apply the Cleaning Solution After you’ve sprayed down the concrete, dilute your concrete cleaning solution with water according to the manufacturer’s directions. It’s best to do this in a bucket or a spray bottle to reduce spills.  Dip your brush into the bucket and evenly spread the cleaning solution across the concrete. If you’re using a spray bottle, spray the concrete until there’s an even coating.  Don’t worry about scrubbing just yet. Depending on what you’re using and what you’re trying to clean, you may need to let the solution sit for a few minutes to penetrate the surface.   Step 5. Scrub the Surface After spreading the cleaning solution across the concrete (and letting it sit if necessary), use the stiff-bristled brush to scrub away stains, moss, and dirt. Most stains and dirt should come up pretty quickly, but more stubborn stains might require extra work.  Spray the surface with a hose or pressure washer to check your progress. If needed, add some more cleaner, let it soak in for a few minutes, then scrub and rinse until the stains are gone.  For the deepest stains, you may need to try a different type of cleaning solution. Try looking for cleaners that are made specifically for those types of stains (oil, grease, rust, etc.).   Step 6. Rinse Thoroughly and Allow To Dry Once all of the stains are gone, use a hose or pressure washer to rinse the concrete until the water runs clear. That means that the last bits of dirt and cleaning solution are gone.  If you’re going to use a sealer or another type of coating on your newly cleaned concrete, make sure the surface is completely dry before you apply it. If your concrete is still wet, the sealant may not adhere correctly. When cleaning cement countertops, dry around the kitchen sink as well as possible, especially if you’re caulking.  How To Clean Concrete Without a Pressure Washer Using a pressure washer to clean your concrete will make the job go quickly, but that doesn’t mean you can’t get the same results with a hose and a little more time and effort. Prep the area by sweeping up any debris and dirt, then wet the concrete with a bucket of water or a hose.  A regular garden hose with a sprayer attachment (like the kind you’d use to wash your car) can rinse off most surface-level dirt and stains.  If you have a small stain on your

Uncategorized

How Much Does a Home Elevator Cost? [2024]

Home elevators have been rising in popularity throughout the 2020s, making homes more accessible and easy to navigate. The average home elevator cost in 2024 is $23,975, with $5,000 on the lower end and $55,000 on the higher end.  Home elevators come in many forms, including wheelchair lifts, pneumatic elevators, and vertical platforms. This guide will explore the factors that impact home elevator installation costs and connect you with home remodeling services in your area. Average Home Elevator Cost Ranges in 2024 Home elevator installation projects can have drastically different prices depending on factors such as complexity and location. For instance, the average cost to build an elevator in Los Angeles County, California, is around $1.1 million, compared to the average price of $4,285 in Fulton County, Georgia. The type of elevator also greatly influences the total price of a project: Factors That Affect Home Elevator Costs The type of elevator you choose, permitting fees, insurance premiums, and other variables affect the cost of your project. Learn which details impact home elevator installation costs to streamline the remodeling process. Type of elevator Different elevators require unique materials and components that can impact their installation costs. For example, cable-driven elevators are relatively simple and less expensive, while pneumatic elevators are generally more complex and costly. Some of the most common types of home elevators include: Size and capacity Elevator dimensions and weight capacity can greatly impact the cost of a home elevator. Elevators that travel across multiple floors naturally require more labor and components, so you could spend between $5,000 and $15,000 per story of the building you’re upgrading. The size of an elevator car is another influential factor. A shaftless elevator normally fits one person and costs upwards of $20,000. Hydraulic elevators cost $25,000 to $50,000 but are ideal for supporting wheelchair users and older adults with limited mobility. Equipment and labor Equipment includes everything from pulley systems to mechanical rooms that keep an elevator running. Some essential pieces of equipment include: Elevator installers and repairers can charge $49.24 per hour on average, though labor costs vary between cities and states. Speak with a local professional for more accurate estimates. Installation complexity Professionals must carefully assess the existing structure of a home before starting elevator construction. They may need to remove ceilings, walls, and portions of the floor to create space for an elevator. Accessible home modifications such as stair lifts can vary in complexity. Straight stair lifts, which move along a straight rail, typically cost between $2,000 and $9,000. Curved stair lifts, on the other hand, range from $9,500 to $25,000. Customization and features Additional features like music speakers and glass panels can increase an elevator’s aesthetic and appeal. You can also incorporate smart home features such as a fingerprint reader or voice recognition software. Speak with local contractors to find the price of these add-ons in your neighborhood. New construction vs. retrofitting   Building an elevator in a new home is typically easier than retrofitting an existing property.  Permits and inspections Mandatory permits and associated fees must be accounted for before contractors can break ground. Building permit costs vary by location; for example, a building permit in Missouri costs between $1,000 and $2,000 while a building permit in California ranges from $1,200 to $3,000. Maintenance  Regular maintenance is essential to keeping an elevator in working order. You’ll also want to have funds saved to purchase replacement parts if something breaks down. Insurance  Contact your insurance provider to determine if installing a home elevator will affect your homeowners insurance premium. If not, you’ll need to purchase liability insurance to cover injuries related to the elevator. Liability coverage typically costs around $150 to $300 per $1 million of coverage. Benefits of Home Elevators  Home elevators offer many benefits for individuals with limited mobility or homeowners looking to turn an unused space into a functional feature.  Increases home value Installing a home elevator can increase a home’s value by 10% to 25% if you choose to sell your property. Keep in mind that a home with a stair or wheelchair lift may appeal to homebuyers with limited mobility but may impact your resale value down the line since they aren’t typically a sought-after feature among homebuyers.   Provides convenience  Larger properties become much easier to navigate with elevators or lifts. This is especially true for mansions and homes with more than two stories. They can also provide an easier way to carry heavy items or transport groceries up and down floors.  Improves safety  People with unique mobility considerations may feel safer using an elevator to travel through their homes. These devices reduce the chances of someone slipping on a missed step or tiring themselves out. Optimizes space  Homeowners can free up space in their properties by strategically remodeling certain areas. For example, a small home elevator can cost about $5,000, which mirrors the price of a curved staircase and may take up less space. Home Elevator Installation Process Installing a home elevator is a multistep process that can take several weeks depending on the project’s scope. The installation process generally is as follows: Contact Denver Home Repair Ⓡ To Improve Your Home’s Accessibility Now that you know more about home elevator costs, you can start transforming your home into a more accessible space. Contact Denver Home Repair to find quality safety and mobility services in your area. We can install and replace grab bars, handrails, and lever door handles throughout your home. We can also widen doorways and install ramps for wheelchair users. This article is intended for general informational purposes only and may not be applicable to every situation. You are responsible for determining the proper course of action for your home and property. Denver Home Repair is not responsible for any damages that occur as a result of this blog content or your actions. For the most accurate guidance, contact your local Denver Home Repair location for a comprehensive, on-site assessment. Home Elevator Cost FAQs Denver Home Repair has been helping homeowners repair, maintain, and enhance their spaces for over 25 years! We are the

Uncategorized

Water Stains on Ceilings: Causes, Removal, and Prevention

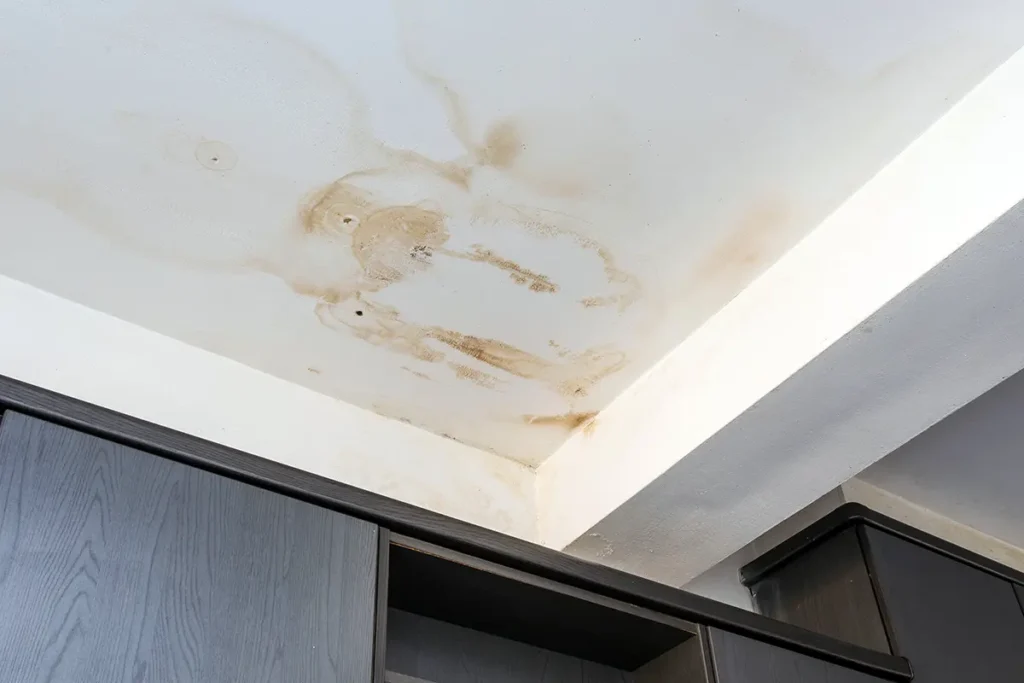
You’re in your kitchen one morning, preparing your coffee, when out of the corner of your eye, you see an unfamiliar splotch of brown on the ceiling. You turn to investigate further and there it is: the beginning of a water stain on your kitchen ceiling.  Unfortunately, a water stain on the ceiling is a common issue many homeowners have to deal with. But what causes water stains on ceiling areas? And how can you remove them and, better yet, prevent them from happening in the first place?  Causes of Water Stains on Ceilings So, what causes water stains on ceilings? From roof damage to internal plumbing leaks, there are a number of potential contributors to the formation of water stains. Learn more about the causes of those unsightly water spots on ceilings below. Roof leaks  Exterior roof leaks are one of the most common culprits of water stains. These roof leaks can range from minor annoyances to massive repairs.  Roof flashing issues often lead to water leaks. If the roof flashing on your home is old, worn away, missing, or in any way faulty, it could lead to leaks inside the home. In addition, if your pipe boot (a type of roof flashing that protects the base of pipes within your roof) fails, you may end up with a roof leak that leads to a brown water stain on ceiling interiors. Shingle damage (and shingle wear and tear) can also lead to roof leaks and water stains on the ceiling in your kitchen, living room, and other areas. Small holes in the roof from old or improperly set nails may also cause tiny leaks through the roof of your home that can lead to water damage. Plumbing issues Plumbing issues are another common cause of water stains on ceilings. Especially in older homes or recently built or renovated homes, you’ll want to inspect pipes as a possible contributor to any water stains you’re observing. Bathrooms are usually a good place to look if you suspect plumbing issues are at the root of your water stains. Toilet seals, rings, gaskets, and caulking degrade over time and can lead to leaks. Clogging or overflow related to toilets and their plumbing is also a major cause of water stains.  Condensation If your home has high levels of humidity and suboptimal ventilation, condensation issues may be to blame for a water stain or a wet spot on the ceiling. Problematic condensation can occur in areas such as the bathroom, kitchen, and laundry room—areas where steam is prevalent but ventilation is poor. This leads to a buildup of moisture that can then cause water stains.  Additional causes of water spots on ceilings Other possible causes of water spots on ceilings include issues with HVAC systems (such as a leaky duct, a cracked drip pan, or clogged drain lines), issues with the foundation of a home (cracks and leaks, especially near the chimney), and improperly installed skylights. How To Identify the Source of Water Stains Before you take any action to address a water stain, you first need to identify the source. Here are some key steps you can take on your own to initially identify the potential source of water stains on your ceiling. How To Remove a Water Stain on the Ceiling The process of repairing a ceiling water stain has a few crucial components. Read on to learn how to cover water stains on ceilings, and when to call a professional for repair.  1. Identify the source Before taking action to remove a water stain on your ceiling, you must first identify where the water is coming from. Visually inspect the ceiling, roof, pipes, and plumbing fixtures to determine where water is getting through. If there are areas of your home you cannot personally assess (roof, internal plumbing, foundation of the home, etc.), call a trained professional.  2. Prepare the area Once you’ve identified the source and have taken the necessary steps to fix the leak, it’s time to prepare the area for repair. If you are conducting the repair yourself, you’ll want to first make sure that the area is well-ventilated; open nearby doors and windows if you’re inside the house. In addition, wear protective gear such as work gloves, goggles, and paint-friendly clothing. Next, gather the supplies you’ll need to complete the water stain repair. Recommended materials include a ladder, putty knife, damp cloth, mild detergent, and paintbrush.  3. Remove the stain Now it’s time to remove the water stain and water-compromised materials from the ceiling. Start by using a putty knife to gently scrape off any excess material at the site of the water stain, such as peeling paint or plaster. You’ll want this surface to be as smooth as possible before applying any spackle or paint.  Once all excess material has been removed, thoroughly clean the stained area with a damp cloth and mild detergent to remove dirt and grime. Allow the area to dry completely before proceeding. 4. Repair the damage (if necessary) After the water stain site has completely dried, you can move forward with visual repair. If there are any holes in the ceiling, start by patching them with spackle or drywall compound. Once the area is dry and painting conditions are ideal, repaint the ceiling to match the surrounding color. If you’re not sure how to fix water stains on the ceiling, contact a professional for help.  How To Prevent Water Stains As the saying goes, “an ounce of prevention is worth a pound of cure.” The best way to repair a water stain on a ceiling is to not have to deal with one in the first place. Here are some ways you can stay on top of conditions that might lead to water stains and keep your ceilings as stain-free as possible.  Call Denver Home Repair® for Ceiling Repair Services Whether you’re looking for help detecting the source of a leak that’s causing a water stain on the ceiling in your home or executing a ceiling repair or major remodel after

Uncategorized

The Ultimate Guide to Standard Kitchen Cabinet Sizes

Remodeling or building a new kitchen is an exciting venture with many decisions to make. A major element of remodeling your kitchen is choosing new or upgrading existing cabinets. Luckily, the invention of standard kitchen cabinet sizes means one less choice you’ll need to make.  Depending on the exact layout of your kitchen, you’ll have to make decisions on base cabinets, wall cabinets, and tall cabinets. Learn more about each of these three types of cabinets and standard kitchen cabinet dimensions for each.  Kitchen Base Cabinet Sizes   The first of these three core types of kitchen cabinets are kitchen base cabinets, which are the cabinets that exist in the space between your countertop and floor. Also called under-counter cabinets, these types of cabinets need to be sturdy enough to support the weight of activity on your counter. Kitchen base cabinet dimensions can be customized to include sinks, corners, pull-out trash cans, and drawers.  The standard height for kitchen base cabinets is 34.5 inches (36 inches including the countertop), while the standard depth is 24 inches. The width of kitchen base cabinets can vary depending on the design, but range from 12-48 inches.  Note: In general, standard cabinet widths have the widest variety across all cabinet types.  Kitchen Base Cabinet Dimensions  Height 34.5-36 inches Width 12-48 inches Depth 24 inches Kitchen Wall Cabinet Sizes  The second of these three core types of kitchen cabinets are kitchen wall cabinets, which are the cabinets that hang on the wall above the counter. Also called upper kitchen cabinets, kitchen wall cabinets come in a wider variety of sizes and can vary greatly in terms of style.  Kitchen wall cabinets are a common design focal point due to their visibility. They can be customized to showcase the homeowner’s unique personality with elements such as glass paneling, unique fixtures, interior lighting, a fun cabinet paint color, and more.  The standard height for kitchen wall cabinets includes options at 12, 15, 18, 30, 36, and 42 inches, while the standard depth is 12 or 24 inches. The width of kitchen wall cabinets is 12, 15, 18, 24, or 36 inches. It’s important to note that the depth of kitchen wall cabinets must be less than the depth of the base cabinets, otherwise you’ll have trouble working and preparing food on the countertops.  Kitchen Wall Cabinet Dimensions  Height 12-42 inches Width 12-36 inches Depth 12-24 inches Kitchen Tall Cabinet Sizes  The final of these three core types of kitchen cabinets are kitchen tall cabinets, also known as pantry cabinets. These cabinets are taller than other cabinet types (hence the name), and there are typically only one to two of them in a given kitchen. They’re ideal for narrow spaces and are not exclusive to kitchens—they may also be found in laundry rooms or separate pantries.  The standard height for kitchen tall cabinets is 84-94 inches, while the standard depth is 12 to 24 inches. The width of kitchen tall cabinets is 12, 24, or 36 inches. How To Measure for Kitchen Cabinets: 6 Steps  Now that you have an understanding of the standard cabinet sizes, you can determine which size options will work best for you and set your kitchen installation professional partner up for success. Follow the steps below to measure your ideal kitchen cabinet sizes. Contact Denver Home Repair for Kitchen Cabinet Installation With this understanding of standard kitchen cabinet sizes, you’re ready to take the next step in updating your cabinets! Whether you’re looking to execute a simple cabinet upgrade, an aging in place redesign, or major kitchen renovation, the team at Denver Home Repair® is here to help you with all your cabinet installation needs.  Request service today and get started in creating the kitchen of your dreams.  This article is intended for general informational purposes only and may not be applicable to every situation. You are responsible for determining the proper course of action for your home and property. Denver Home Repair is not responsible for any damages that occur as a result of this blog content or your actions. For the most accurate guidance, contact your local Denver Home Repair location for a comprehensive, on-site assessment. Standard Kitchen Cabinet Sizes FAQs Denver Home Repair has been helping homeowners repair, maintain, and enhance their spaces for over 25 years! We are the one-stop solution for everything on your to-do list. This includes answering your questions about home repairs, maintenance, and improvements. Here are answers to some of your most frequently asked questions about kitchen cabinet sizes. What size are upper kitchen cabinets? Upper kitchen cabinets, or wall cabinets, have a standard kitchen cabinet height of 12-42 inches, a standard width of  12-36 inches, and standard depth of 12-24 inches.  What is the standard spacing for kitchen cabinets?  An important measurement to consider for kitchen cabinet sizes is the distance between the countertop or top of the base cabinets and the bottom of the wall cabinets. The ideal working space between base cabinets and upper cabinets is 15-20 inches. What is the standard depth of base cabinets? The standard cabinet depth of base cabinets (the cabinets underneath kitchen countertops) is 24 inches. How deep are kitchen cabinets? Kitchen cabinet depth varies on the type of cabinet and the size of the kitchen itself. For example, wall cabinets tend to be shallower than base cabinets—12-24 inches for wall cabinets and a standard cabinet depth of 24 inches for base cabinets.

Uncategorized

Water in a Crawl Space: How To Act Fast and Prevent Damage

There’s no worse feeling than having to wedge yourself underneath your home and noticing the unwelcome sight of water in your crawl space.  Whether you’re dealing with a flooded crawl space or some concerning moisture, the good news is that there are steps you can take to resolve the issue—you just need to act quickly. Let’s understand what causes water in crawl spaces, how you handle water in a crawl space, and how you can protect your crawl space from water damage in the future. Damage Caused by Water in a Crawl Space Just like in any other area of your home, water in your crawl space is unwelcome at best and potentially dangerous at most. Water in your crawl space can cause: Structural damage One of the most serious side effects of water in a crawl space is structural damage to your home. If water lingers for long enough, it can cause your home’s foundation to erode, rotting the wood, seeping into the walls, and causing support beams, columns, and posts to sink, slant, or sag in soggy ground. Once these sort of shifts happen in the foundation of a home, they are very difficult (and costly) to fix.  Mold growth Excess levels of water and moisture in a crawl space can also lead to mildew and mold growth. This is potentially very dangerous since mold is known to cause a number of health issues, which could affect you and your family if water in your crawl space is left undetected or unaddressed.  Invite Pests To make matters even worse, moist environments are magnets for pests, especially termites, who are attracted to rotting wood. In addition to structural damage from moisture, you may also have to deal with damage caused by termites.  How To Handle Water in a Crawl Space If you notice water in the crawl space of your home, it’s best to reach out to a professional immediately. The damage from sitting water can be significant (and can also reach much farther down into the home’s foundation that you may be able to see). A professional like Denver Home Repair® can assess your situation and come up with a solution. Since crawl spaces are not particularly popular areas of the home, one of the biggest issues with crawl space water damage is that it can be weeks, months, or even years until someone notices the issue. And since the water’s time of origin is unknown, this means that there are also unknown levels of danger associated with entering the area. Especially in the case of standing water in a crawl space, floors may be bouncy or eroded, and the foundation may have become unstable and not fit for entry.  Don’t risk DIY—reach out to professionals immediately if you observe water in your crawl space.  How Can Water Get Into a Crawl Space? There are a number of different ways water can get into a crawl space, and the source of the water will determine next steps.  7 Ways To Prevent Water in Your Crawl Space You can hopefully save yourself costly expenses of repairing water damage in your crawl space by taking preventative action to protect your home from water damage. Will Insurance Handle Water in Your Crawl Space?  Insurance coverage varies greatly by company and plan, so you may or may not be able to receive support for water damage in your crawl space.  If you have a water leak in your home, your homeowners insurance may cover it. Some insurances will cover foundation leaks, but not if they’re caused by natural elements. Check with your provider if your standard homeowners insurance covers flood damage.  Turn to Denver Home Repair To Help Remove Water in Your Crawl Space and Repair the Damage Wondering who to call for water in a crawl space? Let Denver Home Repair help! With nearly 200 locations across the United States and Canada and over 25 years of experience, you can trust your local Denver Home Repair team of home improvement professionals to care for your home.  Contact us today, and we’ll call you to set up a service.  This article is intended for general informational purposes only and may not be applicable to every situation. You are responsible for determining the proper course of action for your home and property. Denver Home Repair is not responsible for any damages that occur as a result of this blog content or your actions. For the most accurate guidance, contact your local Denver Home Repair location for a comprehensive, on-site assessment. Water in Crawl Space FAQs Denver Home Repair has been helping homeowners repair, maintain, and enhance their spaces for over 25 years! We are the one-stop solution for everything on your to-do list. This includes answering your questions about home repairs, maintenance, and improvements. Here are answers to some of your most frequently asked questions about water in a crawl space. How serious is water in a crawl space? Very. Water in your home’s crawl space is a big problem that should not be put off! Crawl space water can lead to foundation issues with your home, health issues due to mold growth and pest infestations, and excessive energy prices. If you notice water in your crawl space, reach out to a professional as soon as possible.  How do I get water out of my crawl space? You can use a number of tools to get water out of your crawl space, such as a pump, a wet/dry shop vac, a dehumidifier, and fans. However, these tools won’t help if you don’t address the root of the problem that causes water buildup in the first place.  What do I do if my crawl space is flooded? If your crawl space is flooded, you’ll need to first remove the water. You can do this with the help of a pump or wet/dry shop vac, or call a professional for assistance.  Once the water has been removed, you can dry the space using fans and dehumidifiers. You’ll need to identify whether

Uncategorized

How To Fix Cracked Tile in 5 Steps

Quick answer: This guide will show you how to repair broken tiles by:Assessing the damageGathering tools, supplies, and materialsPrepping the tileFixing the crackApplying new grout  The tiles we use for backsplashes, in our bathrooms, and as a type of flooring are very strong, but they aren’t impervious to damage. If you have a cracked tile somewhere in your home, it doesn’t mean you have to replace your entire floor. Learning how to fix cracked tile is a simple kitchen or bathroom repair, but it can be a time-consuming and difficult process if you’ve never done it before.  In this guide, the Denver Home Repair® team will show you the steps to take to perform a glass or ceramic tile repair. With a few supplies and some time, you’ll be able to take care of your broken tile. Step 1: Assess the Damage If you’re weighing ideas for a new bathroom floor or kitchen backsplash but you have some cracked tiles, repairing them can help make your space look better again while you’re deciding. Before you try to fix a cracked tile, you’ll need to figure out what caused it to crack in the first place. If an impact caused the damage, you can repair it without worrying about fixing underlying issues. But if the surface the tile is adhered to is damaged or uneven, fixing the tile will only be temporary. If water damage has warped a subfloor, contact a plumbing professional for help addressing the root of the problem.  Hairline cracks in a tile are usually the easiest to fix—you may be able to fix them without removing the tile. Repairing larger cracks or more extensive damage is possible, but the results won’t look as good as replacing the tile. If large sections of the tile are cracked or smashed, you may be looking at replacing the tile in your space.  Step 2: Gather Tools and Materials If you’ve decided that the damaged tile can be fixed and the underlying surface is sound, it’s time to gather your materials and tools. Place your tools in the area around the broken tile or set up a space in a well ventilated place with an outlet like your garage or outdoors for the messy parts.  Supplies:  Tools: The kind of grout, adhesive, and paint you need will depend on the kind of tile you’re fixing and how you’re using the space. If you don’t have a saw for cutting tile, a local home improvement store may be able to help. Step 3: Prepare the Cracked Tile for Repairs If you’re dealing with a larger tile or group of tile that has extensive damage, use a grout saw for removal. Go back and forth along the grout until you can lift the damaged tile out. Note that your kitchen tile grout may react differently to the saw than shower grout, so take your time.  If you’re dealing with a small tile, use a chisel and hammer and work along the grout line.  Be extra careful during this step—if you have to use the chisel to pry out tile, go slowly to avoid damaging neighboring tile.  After you’ve removed the tile, clean the underlying surface with the broom and vacuum. Remove any adhesive so the surface is even. Step 4: Carefully Fix the Crack Once the tile is free, use the adhesive or epoxy to stick the pieces back together like it was a puzzle. If there are multiple cracks or heavily damaged areas, use the epoxy as a cracked tile filler to fill in gaps as best as you can.  Use clamps to hold the tile together from the sides, and place weights on top of the tile until the adhesive cures. A heavily damaged tile might not be in its original shape or size, but when you reinstall it, some additional grout will fill in the space between tiles. Step 5: Apply New Grout After your repair tile has cured, mix the grout and apply it to the work area with the grout float. Replace the tile (making sure that the replaced tile aligns with your tile pattern), finish the grout, and let it dry.  Sand the adhesive down until it’s even with the rest of the tile. Clean up any dust with a cloth. Paint over the epoxy and then apply the sealant. If you are replacing a shower tile, use water-resistant grout, paint, and sealant.  How To Fix a Cracked Tile Without Replacing It Replacing a broken floor tile or backsplash with a new one is usually faster than trying to repair a badly damaged tile. But if your tile has a small crack, you may be able to repair it without removing the tile, fixing it, and then reinstalling it (or replacing it with a new tile).  For hairline cracks:  If you have difficulty with this process, hiring a professional to repair your floor or backsplash could save you a lot of time and frustration. It’s also good to discuss bathroom tile ideas with an expert, whether you’re planning to remodel your shower or install a new backsplash.   Tips for Fixing Cracked Tiles Every cracked tile is different, but there are some best practices that can help make your DIY tile repairs better.  It’s important to know your limitations when working on tile. While you might be able to handle a hairline crack in a ceramic floor tile, repairing a break in a glass tile backsplash could be more complicated. Contact a service professional like Denver Home Repair to learn about your options, especially if you’re thinking about a large bathroom remodel project.

Scroll to Top